Tag Archives: DIY

Not quite there yet.

.

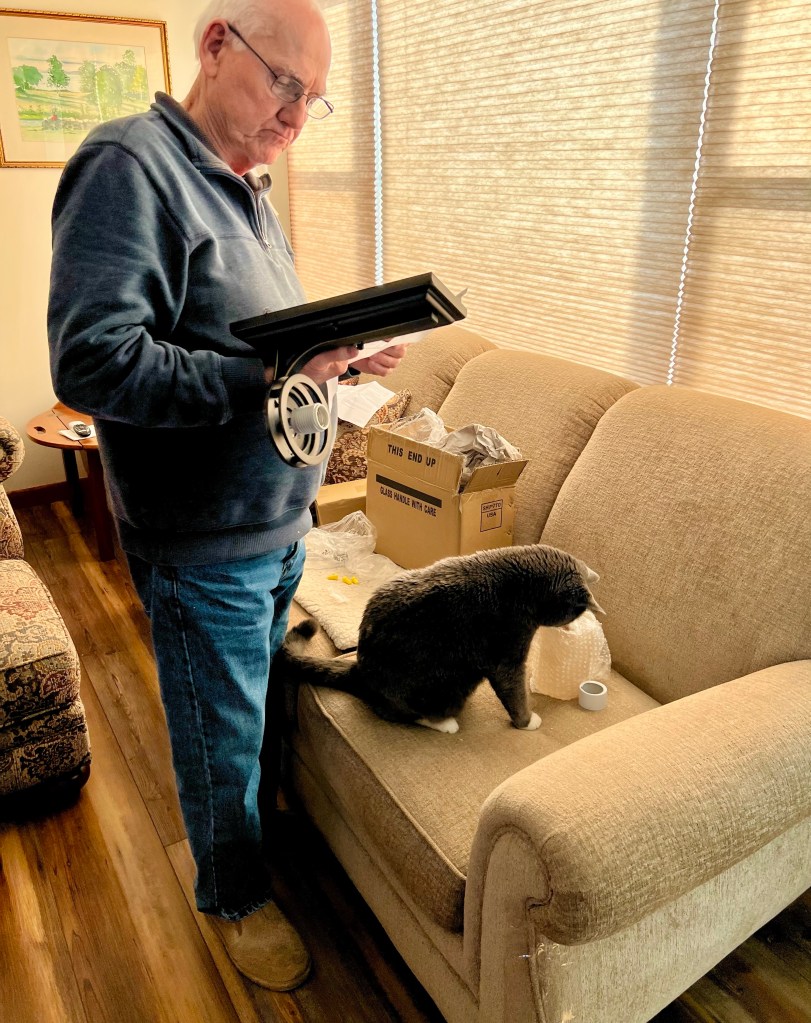
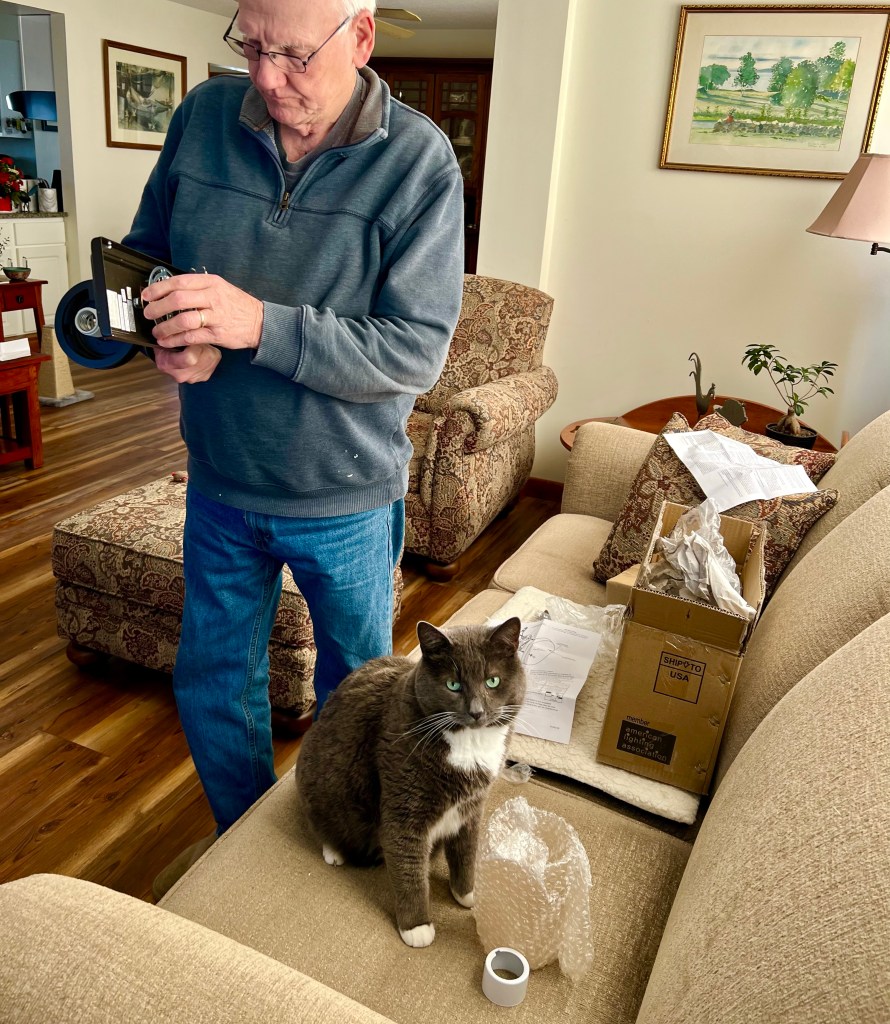
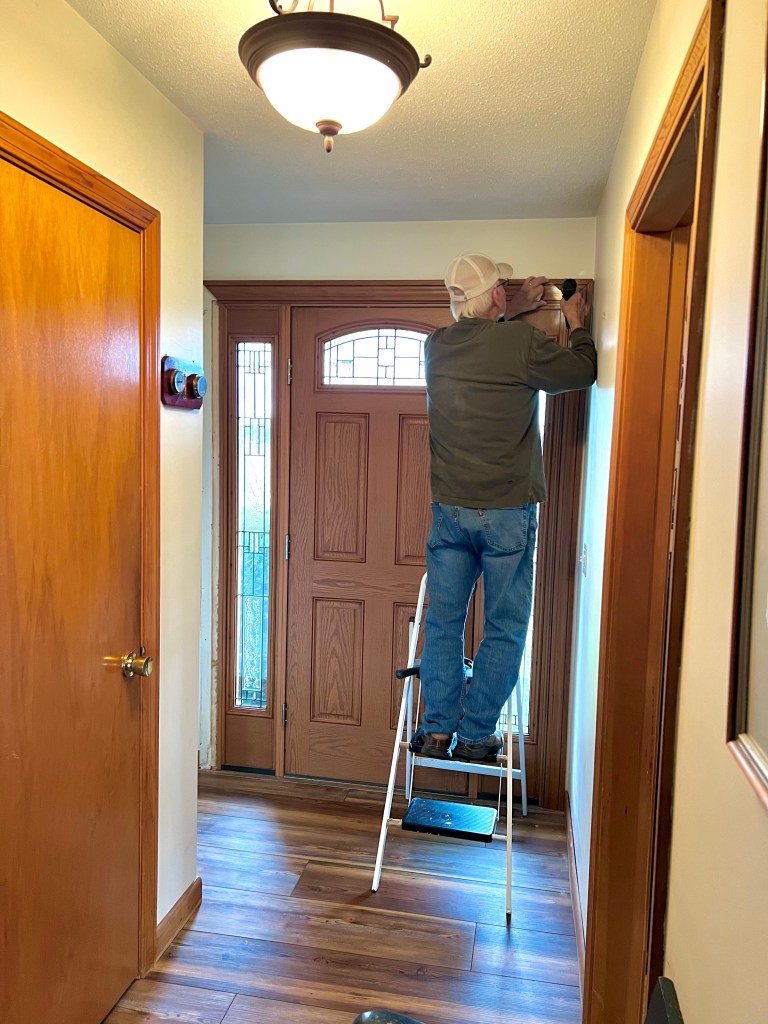
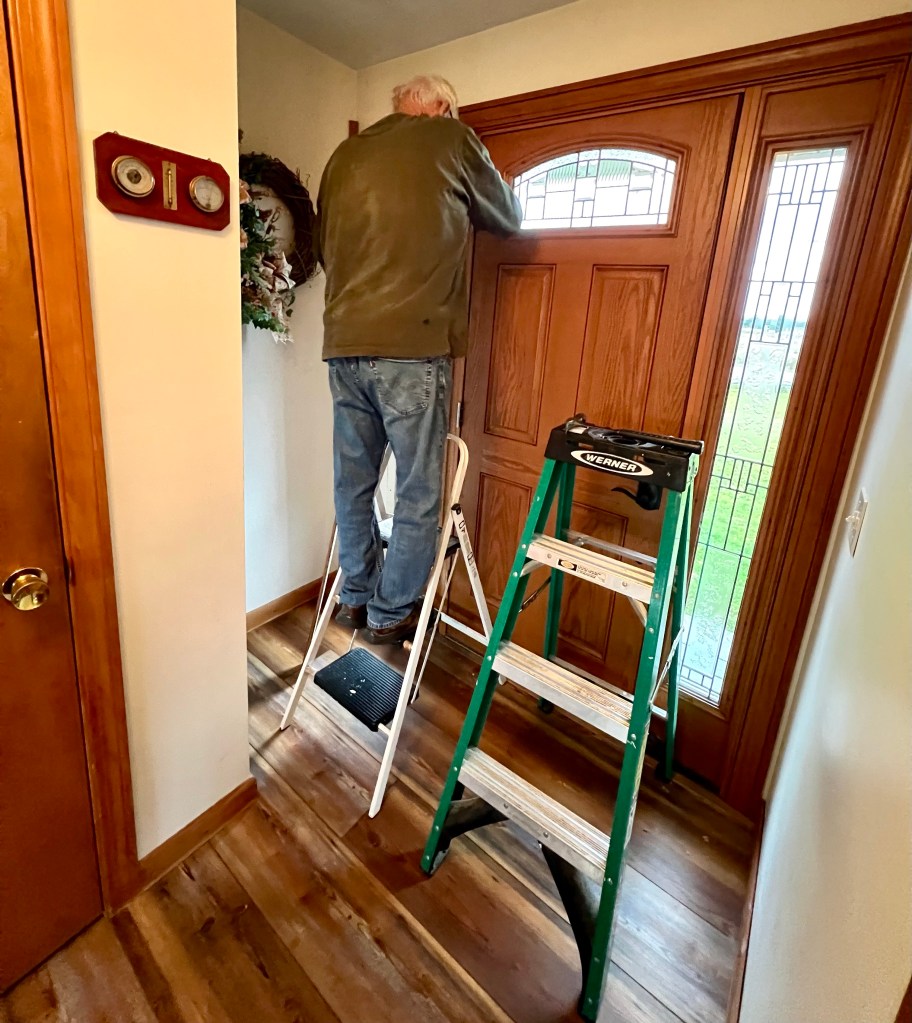
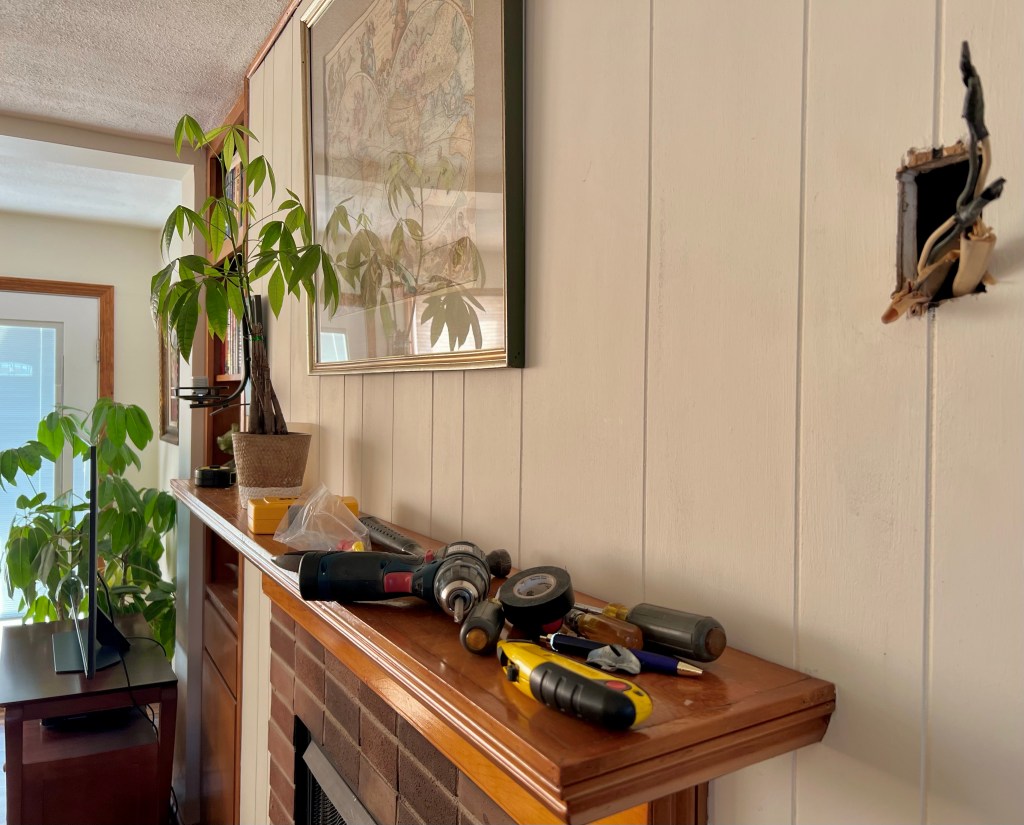
Day two of wall sconce installation saw our mantle taken over by tools

.

.

Multiple trips to the hardware store were needed and my husband’s patience was wearing thin.

.

.

I was trying to speed the process along by dropping helpful hints but was promptly told to vacate the work area.

.

.

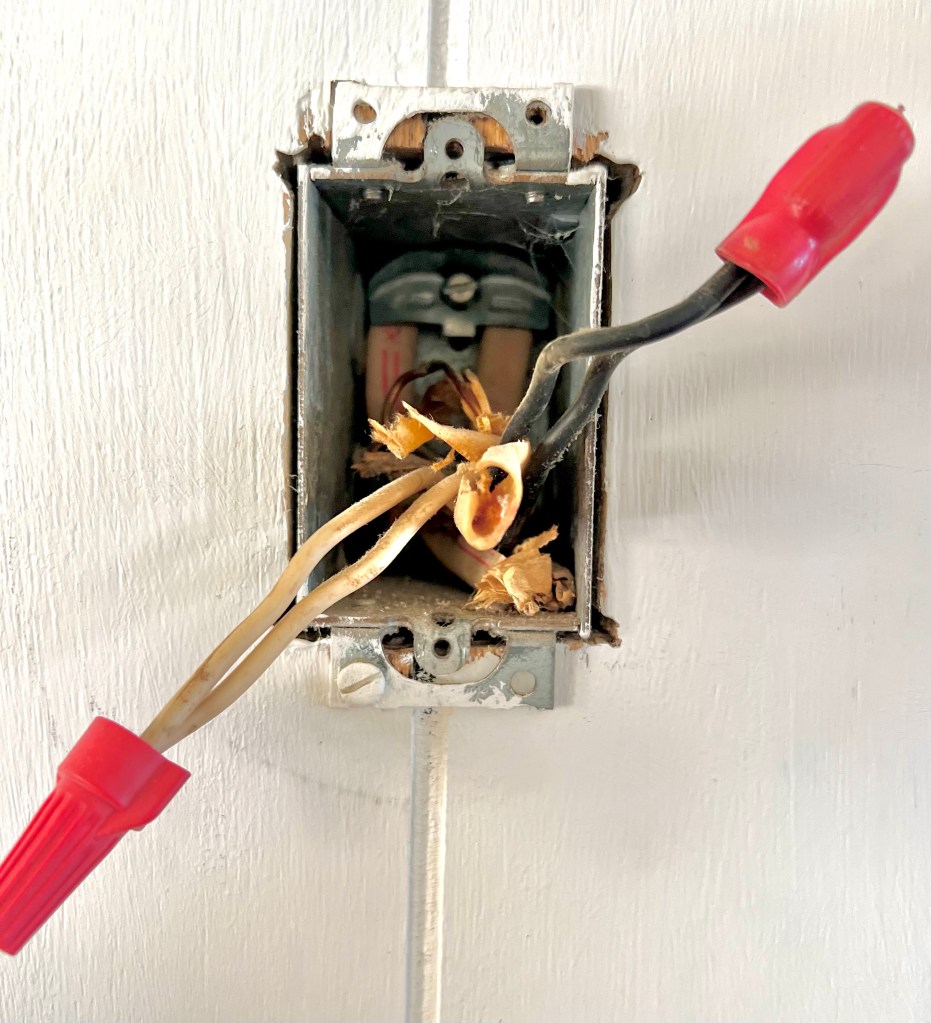
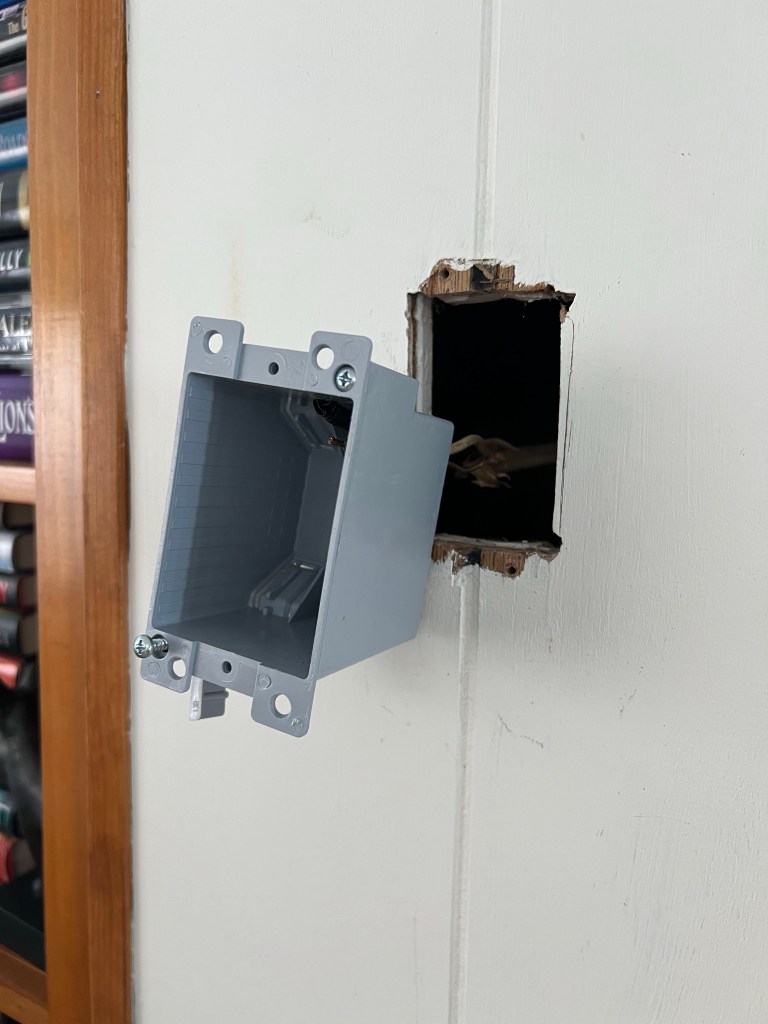
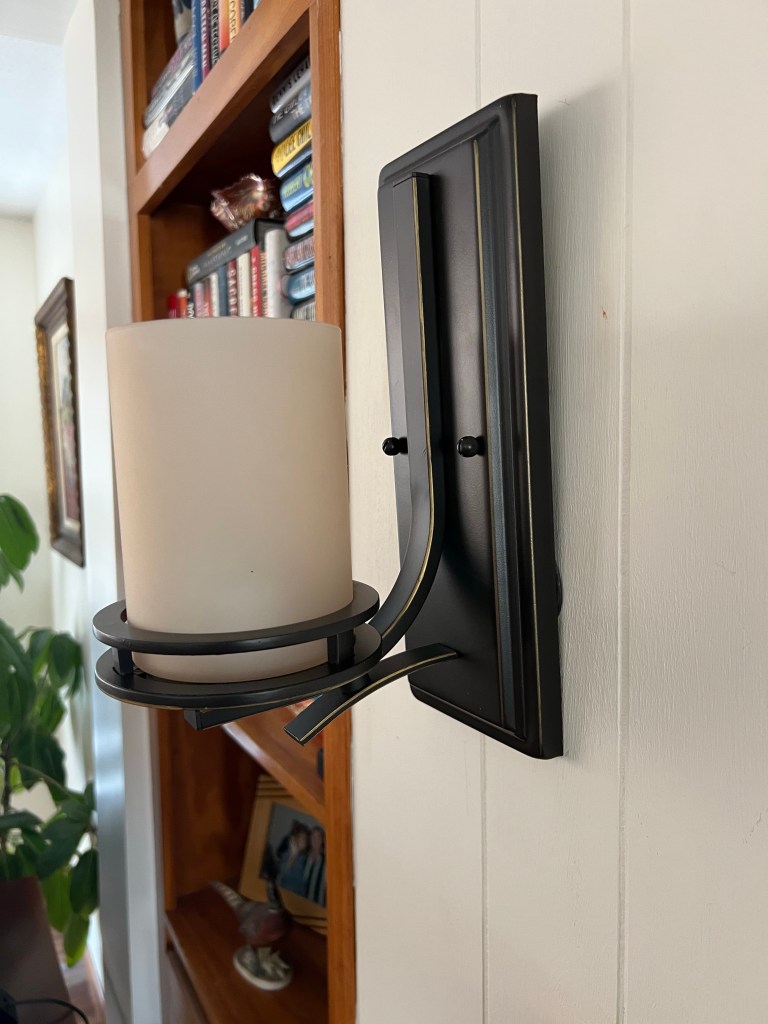
The old wiring was troublesome and at one point I told my husband just to mount the lights and not worry about them being functional. To be honest we haven’t turned them on for years.

There’s a reason for this.

.

.

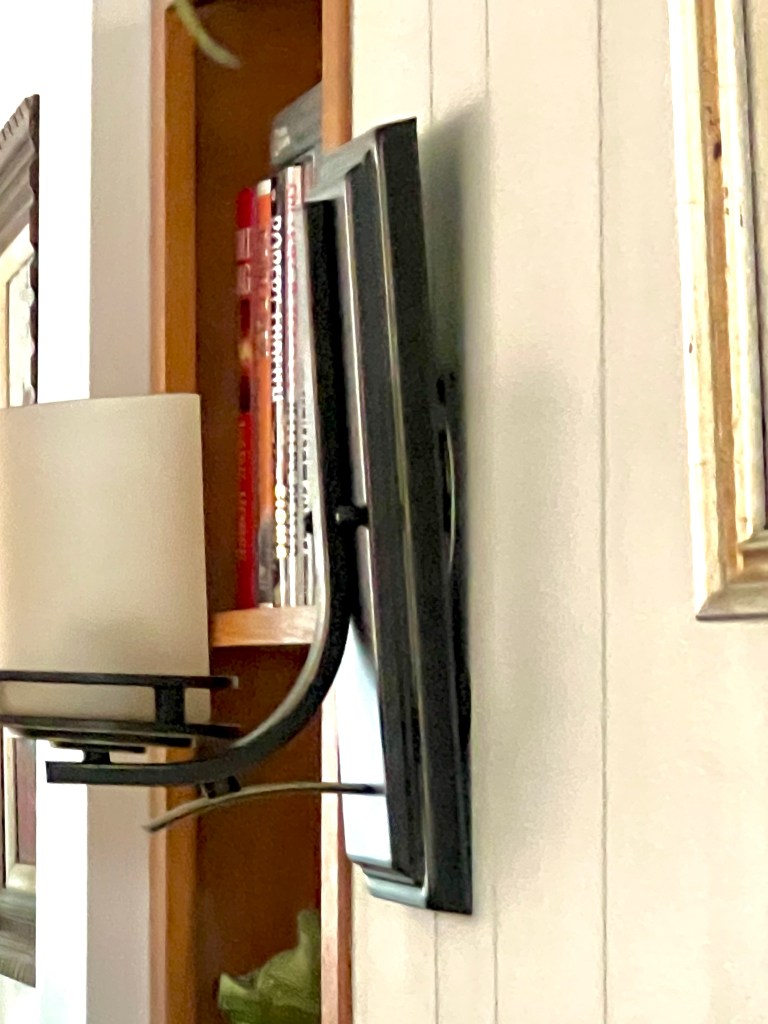
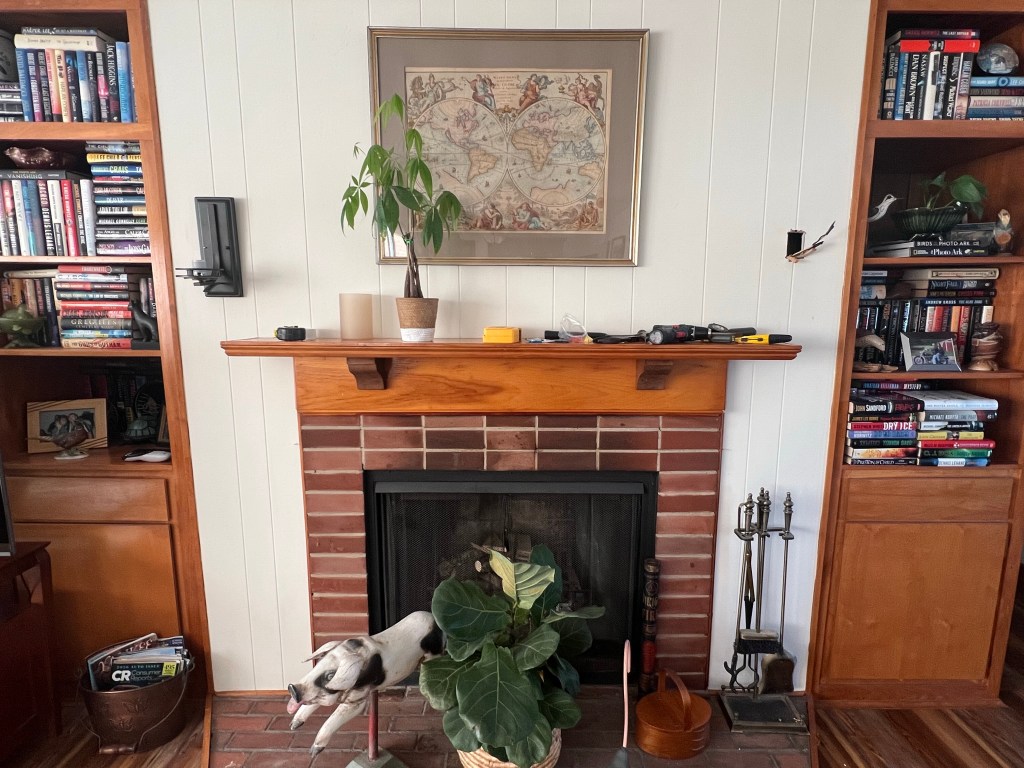
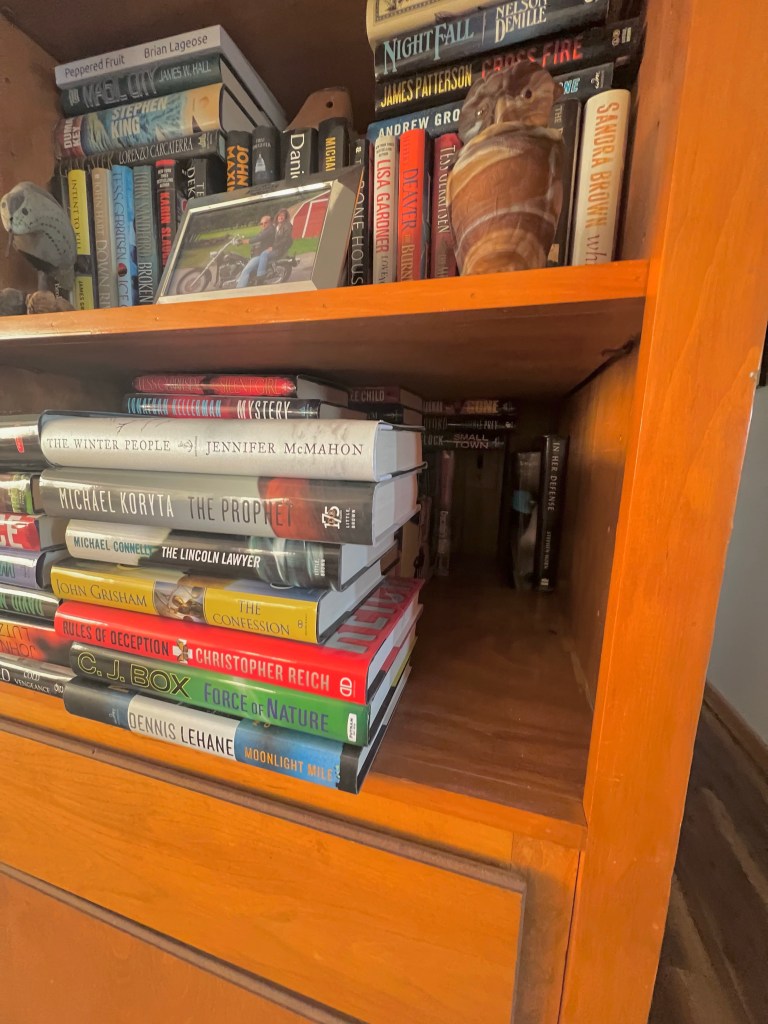
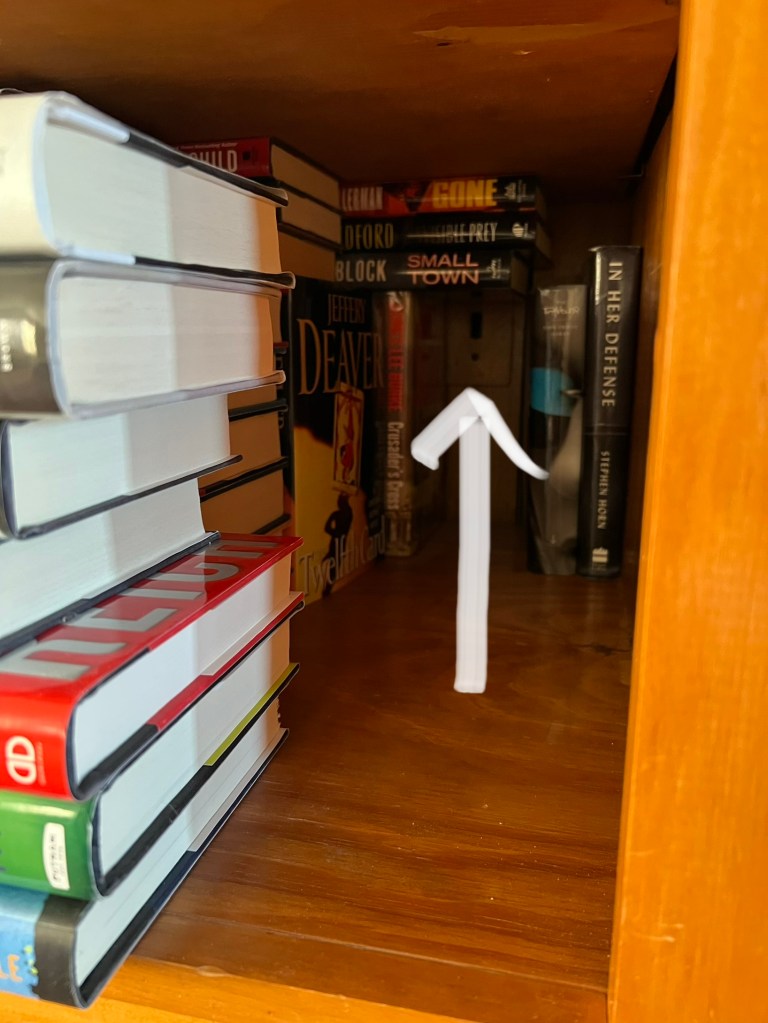
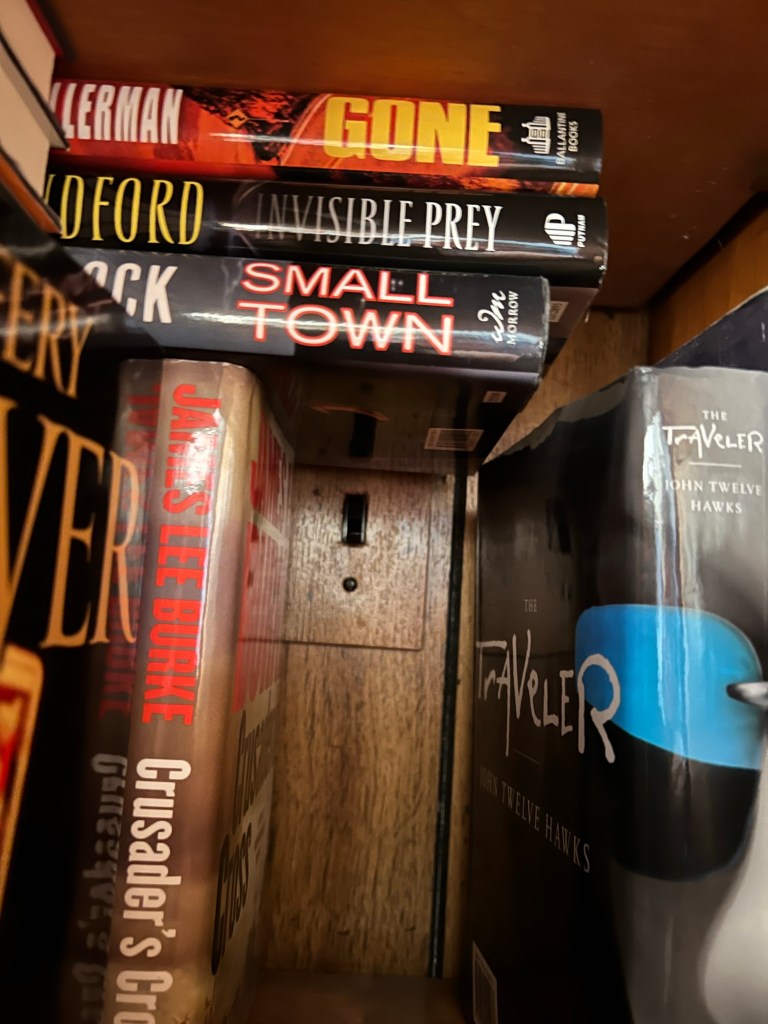
The built in bookcases on either side of the fireplace are deep.

Four rows of hardcovers deep, and reaching the light switch?

.

.

Way back there …

.

.

Means removing a few dozen books every time.

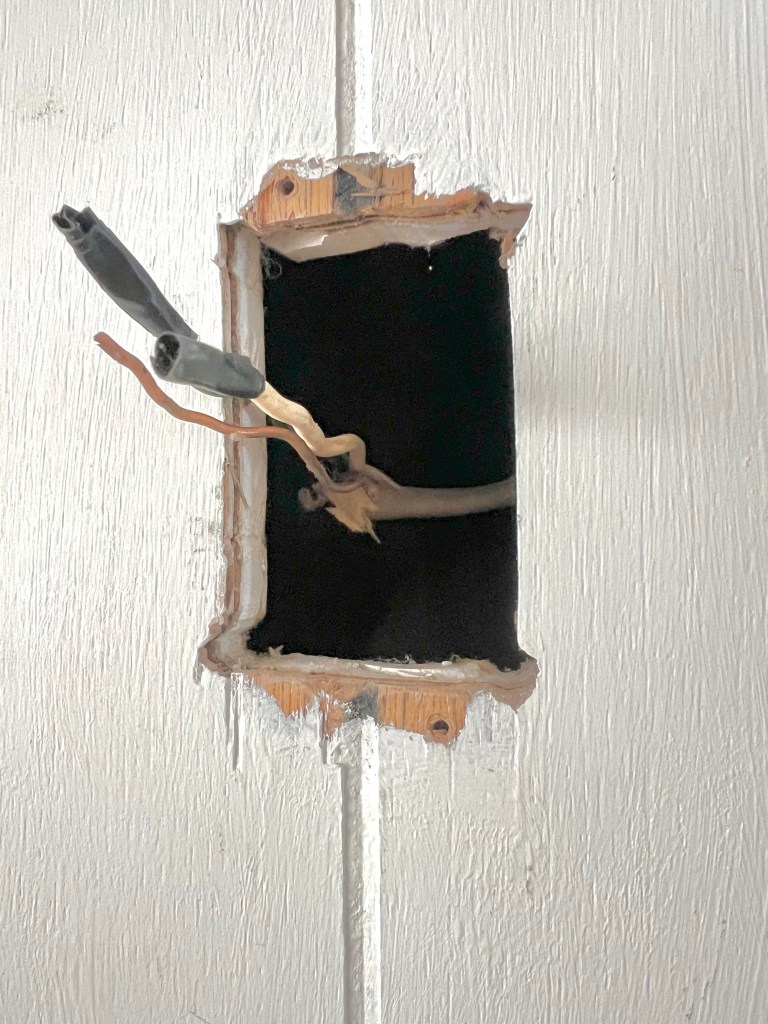
As you can see by the original unpainted paneling, it hasn’t been uncovered for decades.

Stupidest light switch placement… ever.

🥴

.

It’s not going well.

.

Installation of the new wall sconces started simply enough that afternoon.

.

.

With Lord Dudley Mountcatten on hand for the box unpacking assist.

.

.

He follows my husband everywhere, like a devoted dog.

.

.

Me? I’m just tolerated for my can opening and litter box cleaning ability. 🥴

When all the pieces and parts of the lights were laid out and the instructions ignored, because… you know, men… it was time to begin.

.

.

Upon initial examination, the existing electrical boxes (circa 1974 when the house was built) didn’t look good.

They were metal, barely stable, filled with old paper and sawdust and had nowhere to attach the new mounting hardware.

.

.

So they had to go.

New boxes were purchased…

.

.

But of course they didn’t fit.

*side note- this wall is actually two sections of old paneling I painted when we first moved in. Neither of us was skilled enough in wallboard mudding and application to rip it out around the fireplace… so there it’s stayed for 20 odd years. This was never an issue, until now*

For the next few hours my husband cursed, sputtered and cut. Or tried to. He only needed to make the holes a wee bit bigger but doing so without splitting and splintering the ancient paneling was more of a challenge than he thought.

By dinner time he’d finagled the boxes into larger holes, mounted the new hardware, grounded and wired one new sconce and attached it to the wall.

.

.

As you can see this did not go as planned.

To be continued…

Hopefully.

🥴

.

A new project.

.

Remember when my husband tore down most of our old shed and rebuilt it without the addition?

Remember when my husband bought an antique wagon and had to rebuild the addition to house the purchase?

Remember when I complained about having a gaping open hole on the north side of the new addition because my husband couldn’t figure out how to build a door on the wonky shaped opening?

Remember when my husband covered the hole with a tarp thinking that would suffice?

Silly man.

.

.

Door construction has begun.

.

.

I had multiple ideas for this.

.

.

None of which were taken under consideration.

.

.

Have you hugged your door today?

.

.

Remember how nothing was even close to level or plumb when the shed was built?

.

.

It’s going to be interesting…

🥴

.

And to think it only took 67 days.

.

Sixty seven days ago my husband put in our new front door.

.

.

And for sixty seven days I’ve been (none too patiently) waiting for him to finish the job by trimming it with interior moulding.

.

.

Finally!

.

.

It will be nice not to see insulation and ragged edges again.

As usual I assumed the role of quality control and rendered some things unacceptable.

.

.

And though there was a fair amount of grumbling from the installer, it all worked out in the end.

.

.

If sixty six days late.

.

.

Disclaimer – no cats were disturbed during the installation process.

.

Before and after… finally.

.

Our front porch remodel is now complete. New door, new stone siding, new ceiling, new posts, new railings, new decking, new light fixture.

Ka-Ching!

And while there were a few bumps along the way… I have to say we’re pleased with the results.

For someone who’d never worked with stone siding before, my husband did a good job.

As long as you don’t look too closely. 😉

Before and afters.

.

.

.

.

.

.

.

.

.

.

.

.

.

Cleaner, fresher and much more attractive.

👍

.

And around we go…

.

Since the new door was in and trimmed, at least on the outside, it was time to resume stonework.

.

.

I’ll be honest and say the husband really wasn’t looking forward to this part.

.

.

Inside corners are tough to line up properly.

.

.

And we know precision finish work is not his forte.

.

.

But he knocked that small wall out quickly and it looks pretty good, from afar.

.

.

The section that’s really giving him a headache is between the door and the window.

The stone siding sections are 36 inches long…

.

.

So of course the distance between the door and the window is 38 1/4”.

.

.

Not wanting little 2 1/4 pieces and seams running the whole height I asked him to cut the sections different lengths so he could stagger the joins.

This suggestion was not well received.

🥴

.

Trim and a roof.

.

Back at the shed extension project, some trim was added.

.

.

And oddly added at that.

.

.

And even though the third wall/door hadn’t been figured out, work moved to the roof.

.

.

Where my too cheap to buy more husband used part tar paper, part leftover ice and water shield.

.

.

He kills me that way.

.

.

The man thinks nothing of dropping $200 for dinner, but balks at buying a last roll of tar paper or another full piece of wood when leftovers will do.

.

.

Whatever.

.

.

This is where the third wall should go… except the raison d’etre for the extension is rolling the antique carriage under cover so my husband wants to leave it open. I’m lobbying for some type of large door but with the roof angled for rain and the side of the existing building so clearly off square I’m meeting a lot of resistance.

🥴

.

This is what drives me crazy.

.

Work on the second wall of the shed extension was underway yesterday.

.

.

And another window was added.

.

.

As you can tell, I keep my distance. Any suggestions from me are met with a bruised male ego and annoyance that I’m questioning his carpentry skills.

.

.

Which, of course…

I am.

.

.

See that last remaining spot to be sided? It’s a funky little section that required careful measuring and cutting.

.

.

Which my husband never does.

.

.

It’s just easier to gerry rig the section with 3 different size pieces.

Sigh…

🥴

.

And the shed doth groweth..

.

Work has resumed on the shed extension.

.

.

And it’s extended to contain two windows.

.

.

The wood siding was purchased from the same local man who provided the existing shed’s siding…

.

.

Problem is….the old siding was 8” wide and the new is 12”.

.

.

This bothers my husband not one iota…

.

.

But is apt to drive me crazy every time I look at it.

.

.

As does my spouse’s less than even board cutting.

.

.

‘Good enough’ has always been good enough for my man when it comes to building.

.

.

🥴

.

The exterior door oopsie.

.

As previously reported, the new door is in and secure.

.

.

Though my husband’s faulty depth measurement raised its ugly head on the exterior.

.

.

Raw unfinished wood was showing on both sides…

.

.

Thankfully since he’ll be butting the thick stone siding next to it, a bit of pvc trim covers the mistake.

.

.

I usually get nervous when my husband has to mitre something…

.

.

But he did well this time around…

.

.

With only a few minor adjustments.

😊

.