Tag Archives: projects

A little drip now and then….


Leaking roof saga continued.

Winter is the worst possible time in Maine for your roof to spring a leak … so of course, that’s exactly what’s happened.

Remember when I said I’d cringe every time it rains?


That’s the sound of me cringing.

It poured the other day… and so did our ceiling.


IMG_2897


So much so I had to add another pan.

Which drove the husband nuts when he came home…. and because he’s a man and had to do something?


IMG_E2879


Yeah. He decided to climb up into the attic to see where it was leaking.

Naturally this isn’t as easy as climbing a set of stairs… because no.

Here at Casa River, we like a challenge.


IMG_2909


The den closet, home to an overflow of the husband’s useless crap  treasure.

(Yes, he collects old wooden hangers. Don’t you?)


IMG_2873


Half of one side had to be emptied and strewn all over the room….


IMG_2872


Because the only way to access the crawl space we call an attic is to remove all the shelving and climb up a hole at the top of the closet.


IMG_2871


A design paradigm we curse the builders for quite often.


IMG_2876


It’s a bit of a nightmare getting up there.


IMG_2878


And no, the husband didn’t appreciate me making a Kodak moment out of the experience.


IMG_E2884


He wasn’t thrilled that I stuck my head up through the hole to offer advice either.

Men. There’s no pleasing you.


IMG_2885


But look… I found an antenna from the 1970’s!


IMG_E2889


Did I mention there’s no actual floor up there? Just a few scattered pieces of particle board that break when you kneel on them.


IMG_E2887


So after scuttling around like a crab and lying on his back…


IMG_E2888


And pointing his flashlight near the section of the roof of the addition you can’t access from the crawl space, he did find where the water was coming in. Halfway up the peak, and running down the beams…. which we can find absolutely no reason for.


IMG_E2891


Doesn’t this look like fun?


IMG_E2893


Especially since there’s not a damned thing you can do about it until spring when you can rip off the shingles to find the bad spot.


IMG_2899


Meanwhile I’ll have this lovely and ever expanding wart to look at.

And every time I do?

I hear a cash register.

Ka-ching!


The baby barn saga continues….


Next up? Permanent walls for the third side.


IMG_6646


As opposed to the numerous sets of temporary walls we’ve installed, uninstalled and installed again.


IMG_6650


And it’s finally starting to take enough shape for the husband to hang up a few tools.


IMG_6649


Of course…. a chain, a pick ax and a shovel might not bode well for me and my oh so helpful ideas.


19225048_10209459279380532_1847709635140901895_n_large


The floor is still 2 different levels of dirt thanks to the woodchucks and chipmunks….


IMG_6647


But we haven’t had time to deal with it between rain storms.


IMG_6656


The husband has also discovered that when I’m busy taking pictures… he can use his head for a brace. It works quite well.


IMG_6654


So, walls and roof section on…


IMG_6659


The tape was applied.

If you’ve never used the Zip wall and roofing system? Let me tell you… this stuff is golden. I don’t know what the hell they treat it with but once you tape up the seams it stays waterproof for a long time. I think they say 3 months open to the weather, but on our big barn we left it for over a year… through a Maine winter.. and it was fine.


IMG_6658


You’re only supposed to use the tape with the Zip pieces, but baby barn has so many gaps and holes we taped everything we could find in preparation for a big upcoming storm.


IMG_6664


Did the husband get a little happy with the tar paper caps? Probably, but we get some hellacious wind blowing across the fields.


IMG_6661


So, three and half sides are done and it’s battened down for rain and wind.

Maybe it’s just me, but I swear it’s big brother is looking down in disgust.


Sadly, we may not have time or appropriate weather to finish it this year. I seriously wanted shingles on before the snow flies but my husband says the siding and trim have to go on first… something to do with flashing.


221yym


Although what that has to do with anything….

I’m sure I don’t know.


IMG_6665


So, fingers crossed we can at least remove that last rotted section soon.

It’s a little too split personality for my taste.


hED0D5F5A


Another baby barn update.


IMG_6572


Next step in the baby barn remodel was the removal of the addition the previous homeowner added.


IMG_6569


This was easier said than done….


IMG_6574


And at times required multiple beatings with a crowbar.


imagesTV6VOQK3


Slowly but surely it came down.


IMG_6575


And the temporary walls and roof were removed.


IMG_6634


Which is when we noticed a wee bit of sag.


ysqbu


A little lifting…


IMG_6637


A little of me saying WTH?


IMG_6638


A whole lot of digging….


IMG_6640


And propping up later, it was level.


IMG_6645


On that side…. which usually throws all the other sides off.

I swear this entire project has been so much work than it needed to be. We could have torn it all down and rebuilt an entire new one in half the time it’s taken us to get this far. Which I believe was my original idea.

Cold weather is fast approaching, and we’re no where near done.


News flash – yours truly will not be out there working in sub zero temps.


winter-cold-weather-meme


Babies can be annoying.


Let’s face it, there’s going to be a weekly baby barn update for the duration of the deconstruction/construction.

Which, at this point…. I figure will end sometime between  Jesus, isn’t it done yet?  and   If I have to pry one more splinter out of my hand, I’ll shoot myself in the head and call it good.

Walls.


IMG_6383


If you’re an immigrant during this administration? Not Good.


IMG_6387


If you’re a rotting baby barn circa 1974?  Very good.


IMG_6386


Here’s a pic of the husband using his vintage (what feels like 50lb) saw.

You’ll notice he’s hunched over and applying pressure. That’s because the damn thing shimmies like a tilt a whirl on crack and might fly apart if you don’t.


Walls.


IMG_6390


They’re a good thing. But sometimes…


IMG_6394


You see where I’m going with this?


IMG_6397


From the outside all looks well.


IMG_6400.JPG


From the inside, things went a little squirrelly on the right.

Crooked?


little bit


Do we care?

We do not.


IMG_6399


Do we wait for the wife to bring the dust pan during clean up?


So, another weekend done.

Another section framed and ready for siding.


IMG_6405


Did I mention that the husband’s plan of starting at the halfway point on the front and working his way around makes it look a bit odd?


IMG_6406


Rather like a schizophrenic.

Perhaps I shall name her Sybil….

This is not what you want to find when rebuilding….


Our old baby barn/shed has a dirt floor with heavy duty rubber mats on top. Due to numerous woodchuck holes and tunnels, we had to drag all the mats out. That sounded easy enough until I realized each one of them weighed the equivalent of an African elephant…


IMG_6239


Seriously.

A pregnant, morbidly obese African elephant carrying a suitcase I packed for an overnight trip.


IMG_6242


Did I mention they were all covered in pounds of dirt as well?


So as we’re moving the next to last mat…..


IMG_6250


This.


IMG_6260


A chipmunk burrow with tiny scraps of paper, plastic and leaves.

Upon further examination…


IMG_6275


A maze of tunnels, which I thought was pretty cool, until… it moved.


IMG_6253


Do you see the leg?


IMG_6255


Yeah.


IMG_6259


Not a tunnel.

A nursery…


IMG_6264


Which means we had to find the other end of the tunnel and relocate them. Not an easy task.

Five minutes after we found them?

Momma found us.


IMG_6286


And she wasn’t happy.

She ran around squawking and chirping and looking for her babies.


After a while I think she found them, because she stopped searching and started stuffing.

Stuffing her little cheek pouches full of all those little scraps of paper….


IMG_6289


And scurrying back for more.

Within minutes she’d cleaned up the whole lot.

Watch her cram a dried leaf that’s almost bigger than she is below.

(And please pardon my husband’s cursing. Things were not going well with the rebuild at this point…)


After we wasted time relocating chipmunks, we realized we had to relocate a bird’s nest as well.


IMG_6281


So many evictions.

I felt like an evil slumlord.


IMG_6284


Back to work…. and things did not go well.

Which was completely the husband’s fault.


IMG_6295


He had the crazy idea he could square the building properly  (After 40 plus years of Maine frost heaves? Madness!)  and changed the original footprint….. which in turn threw everything off kilter.

More good times.


IMG_6296


Did I mention he uses tools from the 1950’s picked up at a yard sale or the dump?

This little jewel feels like it weighs 50 lbs.


But he has the original box… and vintage lube.

So it’s special.


IMG_6349


P.S.  For those of you who pay attention, this post is actually out of sequence. That back wall is gone now. Apparently my blog scheduling has run amok.


Another weekend, another wall.


Work on the baby barn project graduated from glacially slow to slow as molasses last weekend…. and we managed to frame a wall in 3 days.


IMG_6321


Though to be fair, ripping off that old rotted pressboard is like Chinese water torture.


IMG_6322


It literally shreds in your hands.

But slowly… we saw daylight.


IMG_6330


And by Saturday afternoon we had open space and a center post that was barely hanging on.

And by barely?


IMG_6336


I mean barely.


Untitled


The husband did the usual dirt shuffle in his ongoing attempt to level the building. A pipe dream at best as it was built in the mid 70’s… and it’s Maine.

Frost heave central.


IMG_6334


Measuring is fun.


IMG_6345


Ripping out posts that were nailed in with spikes?

Not so much.


IMG_E6393


Pardon the sun glare and bad manicure… but damn.

Talk about overkill.


IMG_6346


Framing started Sunday, with a new window taking center stage.


IMG_6361


And continued when the husband decided to dig out all the dirt underneath the structure…


IMG_6362


And lay paving stones in yet another attempt to level it.


20enzo


Then came the rain… and a mad dash to put everything away before it got soaked.

And then?

Then… the baby barn got a rainbow.


IMG_6368


And I found my honey at the other end.


IMG_E6378


Can I get an awwww?


And so it goes….


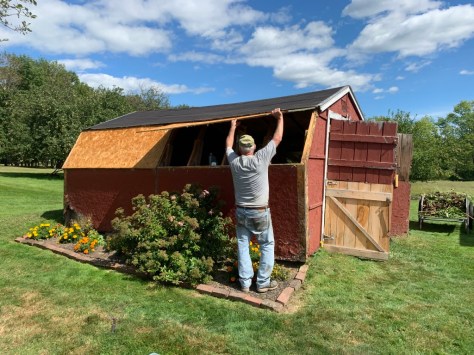
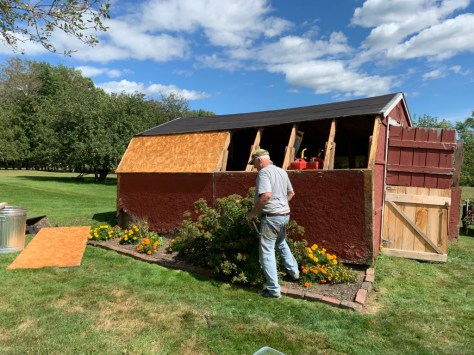
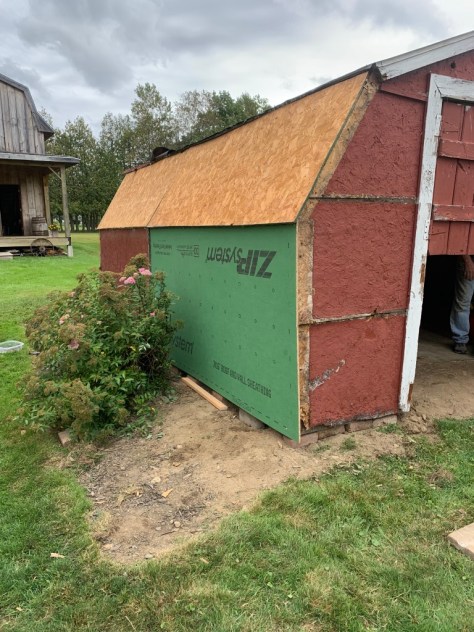
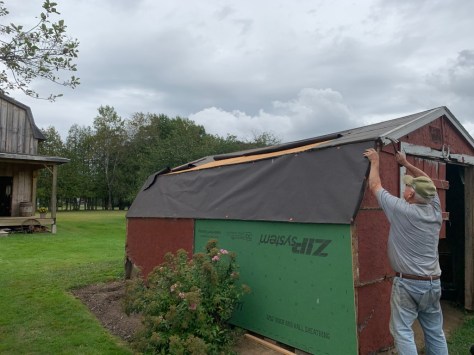
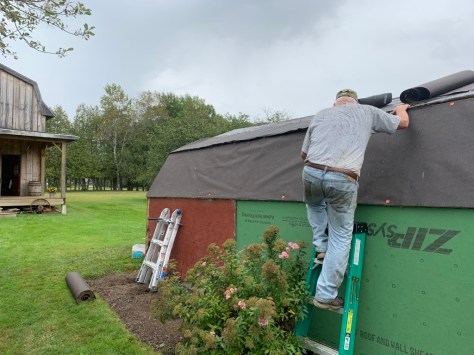
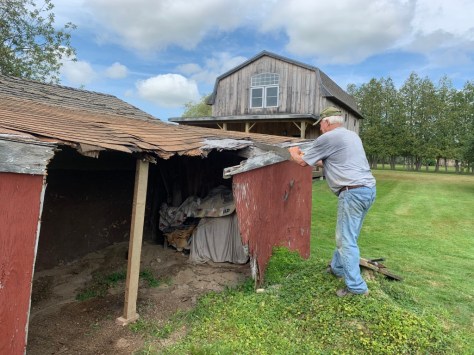
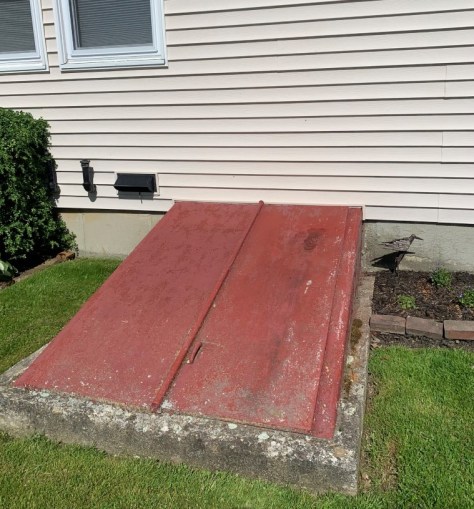
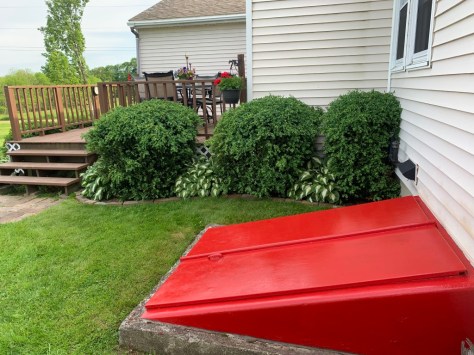
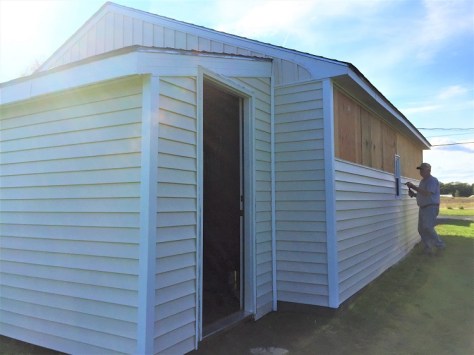
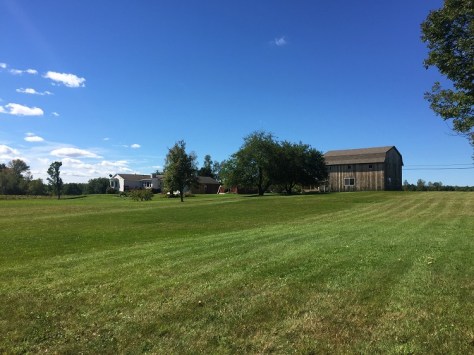
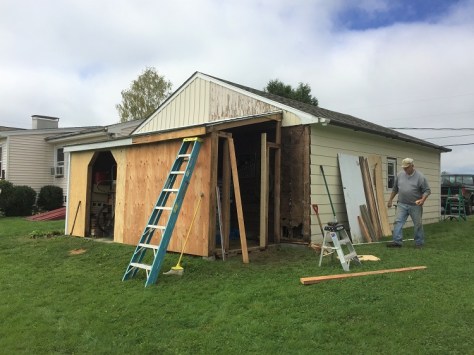
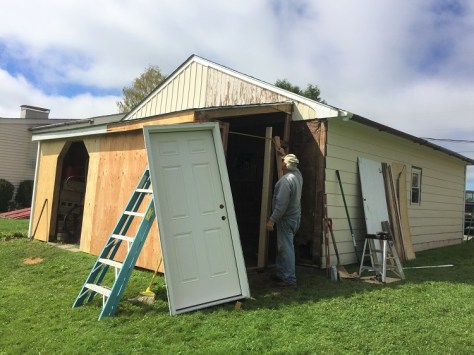
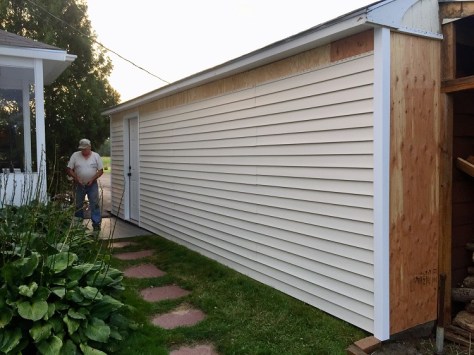
Work on the baby barn continues, albeit slowly.


IMG_6215


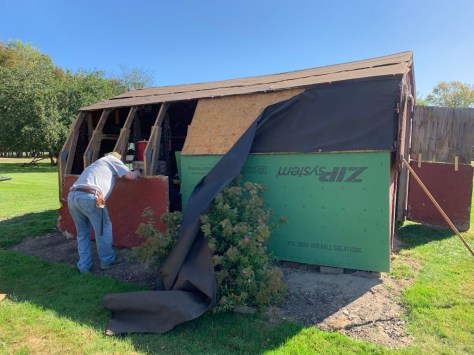
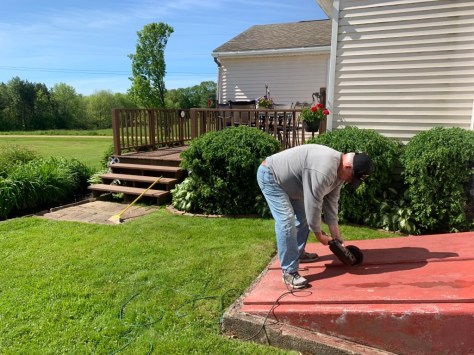
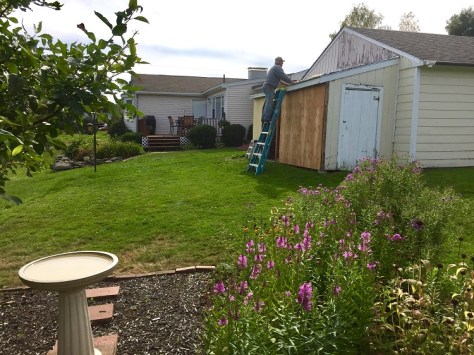
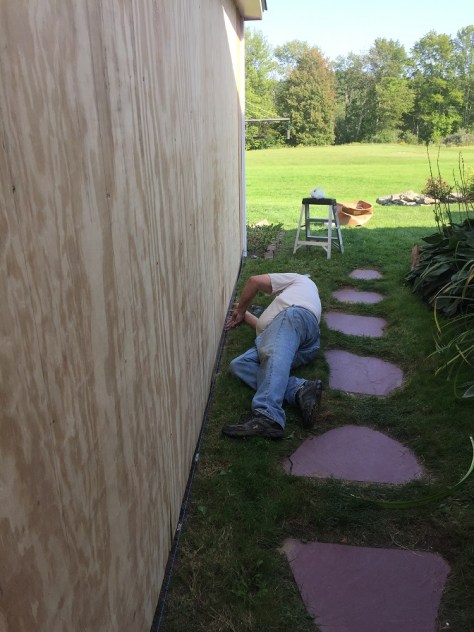
My husband’s master plan involves a serious amount of temporary screwing, refitting, removing and replacing. He’s not a huge fan of measuring… but he’s a man.

This is not surprising.


h16CDF43D


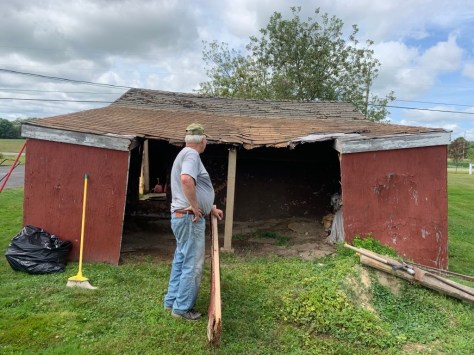
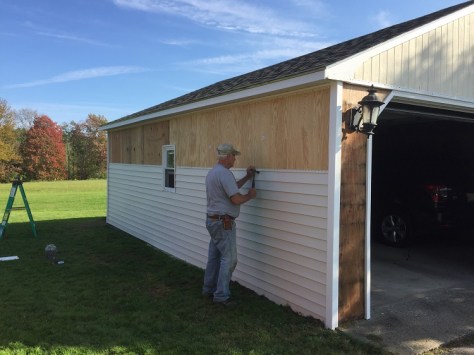
Of course this means 3 times as much work.


IMG_6226


I think one planned demolition and rebuild would suffice…. but I’m a woman.

What do I know?


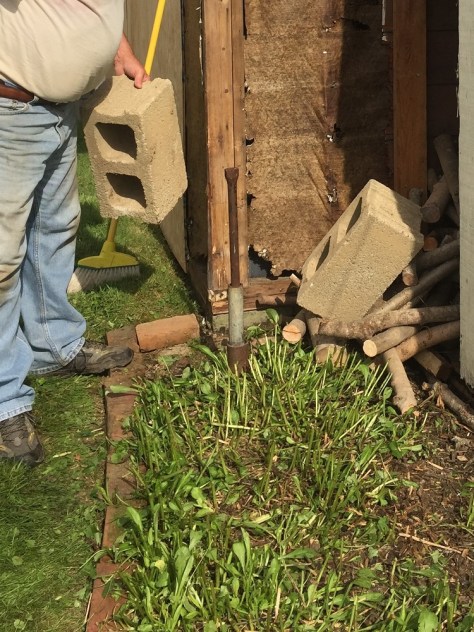
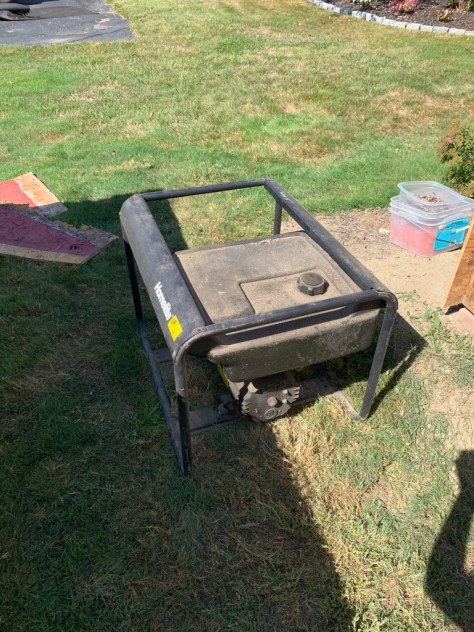
There’s also a good deal of shifting the husband’s  crap we don’t need now, nor will we ever need again   stuff from one place to another. Like the hurricane generator we bought in 1992 when we lived down south and haven’t used since.


IMG_6247


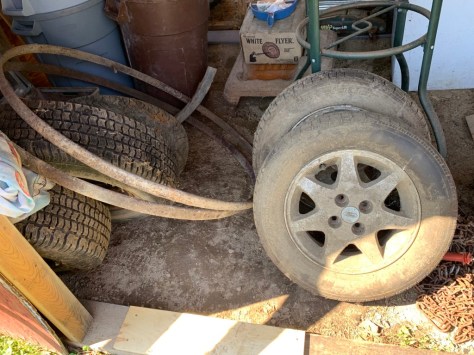
Or the wheel weights for the tractor we no longer own.


IMG_6244


Or the numerous tires for the cars we no longer own.


IMG_6248


Or the table that went with the chairs we no longer own….


IMG_6249


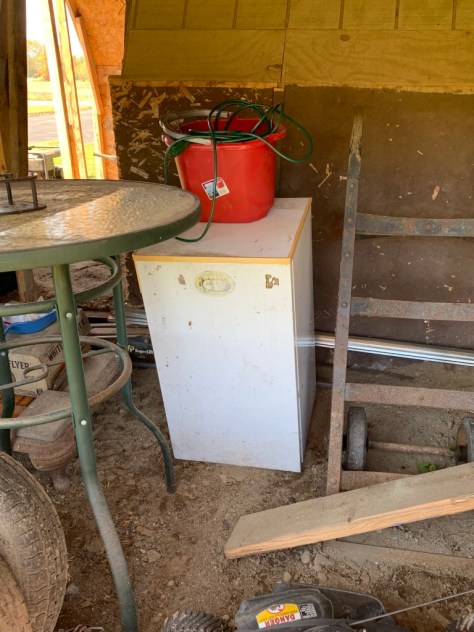
Right beside the small refrigerator I had no earthly idea we owned.

All of these things are heavy and filthy and must be moved over and over again because he can’t be convinced to throw them out.

Good times.


IMG_6235


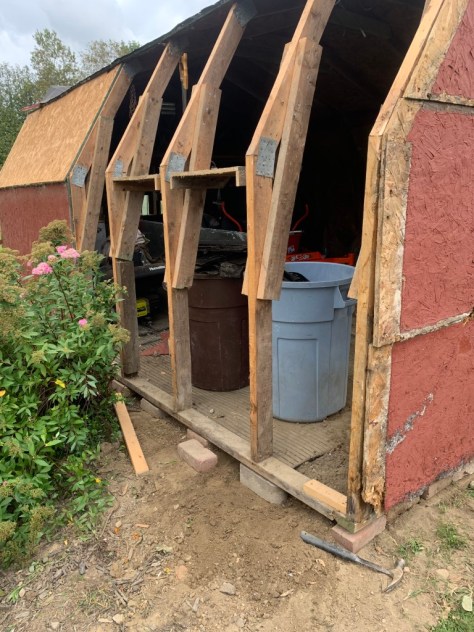
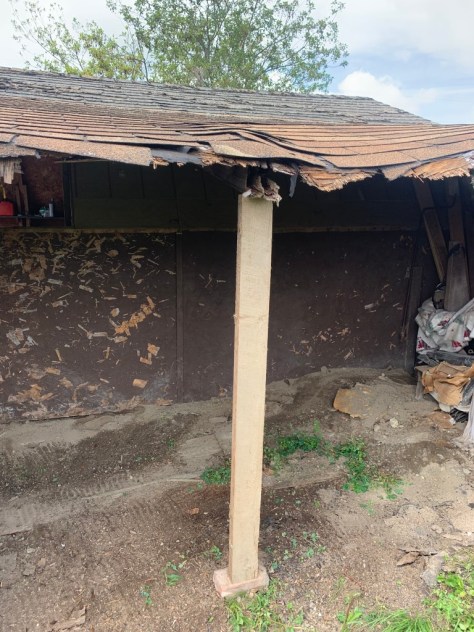
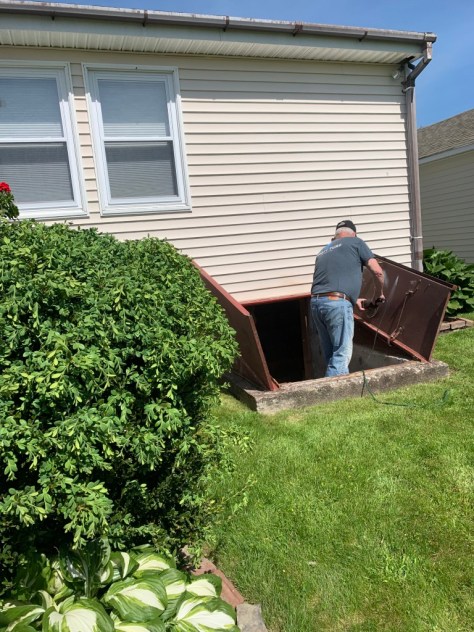
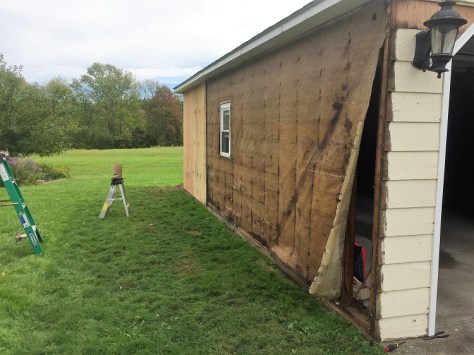
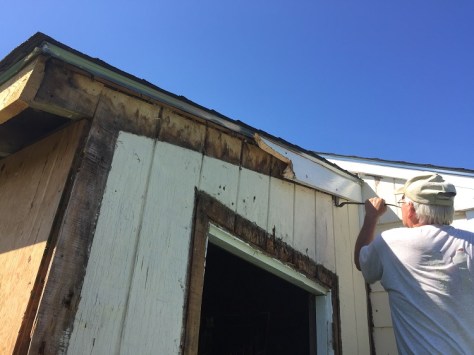
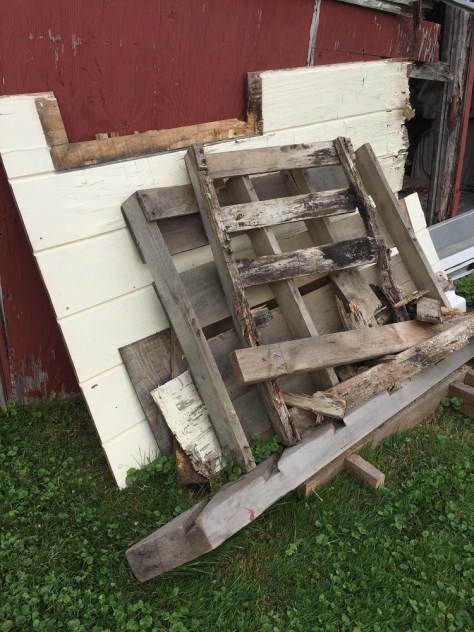
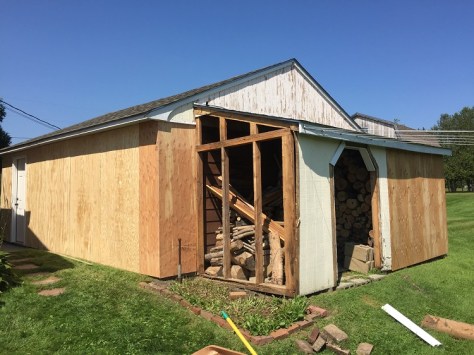
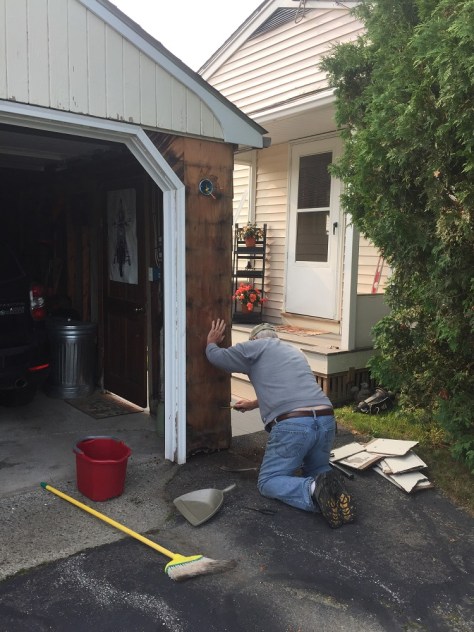
There was hammering.


IMG_6234


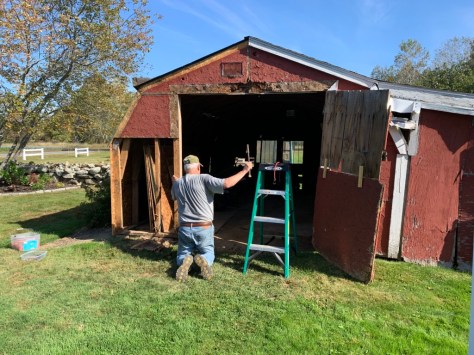
And crowbar-ing …. and yes. A good deal of cursing because the structure is 45 years old and not exactly plumb.

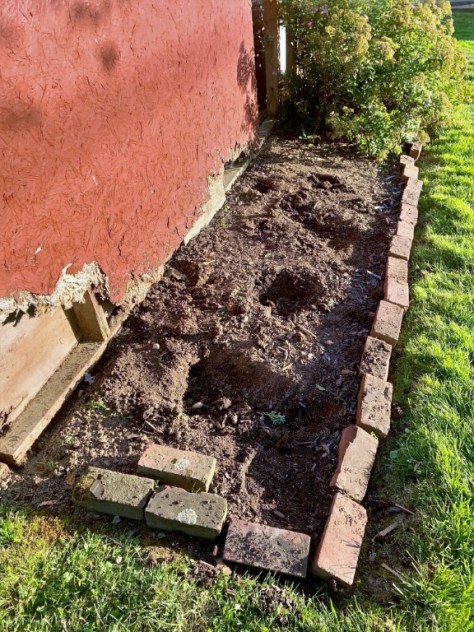
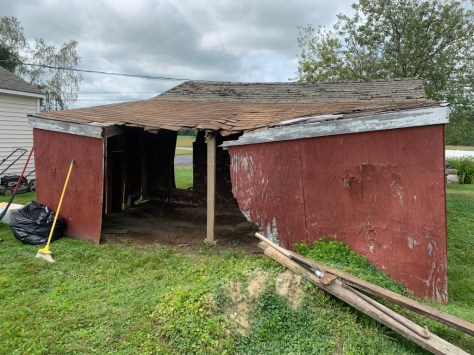
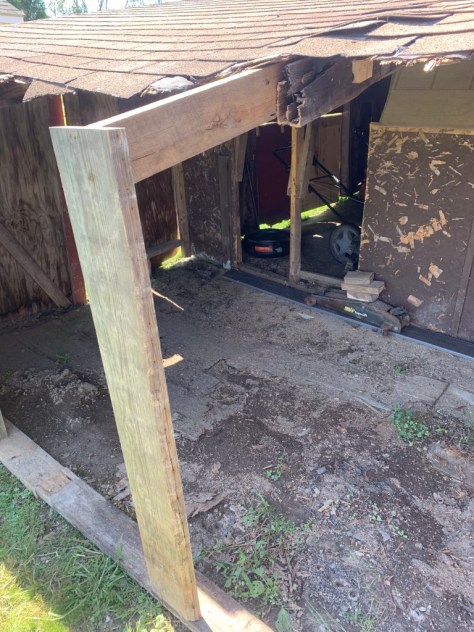
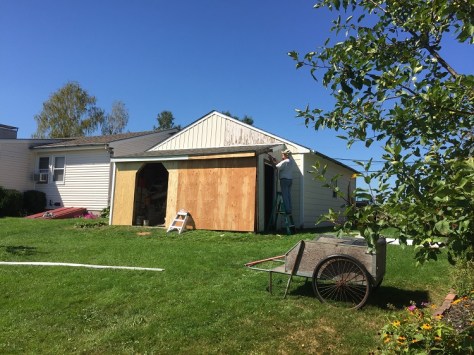
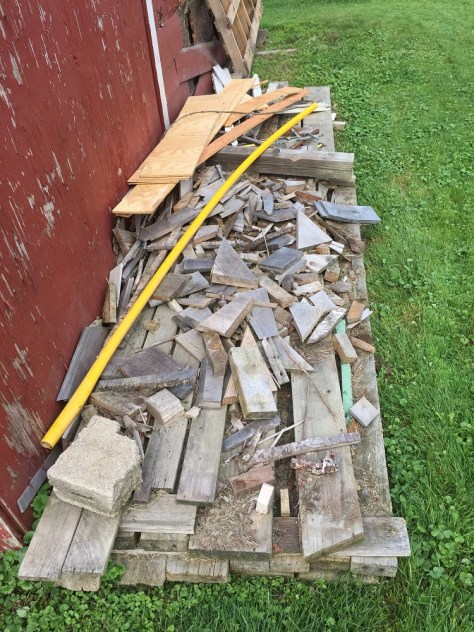
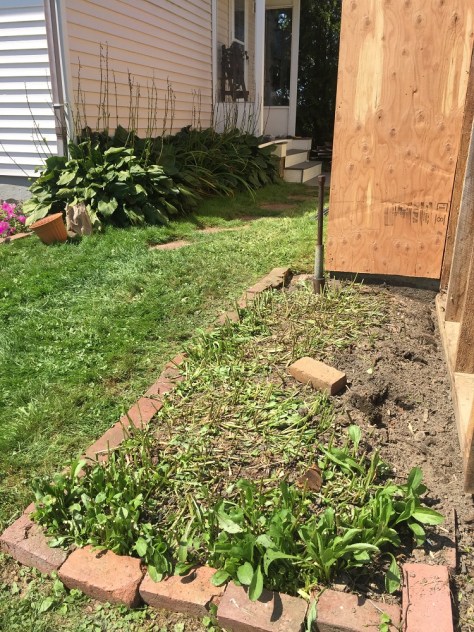
There was also a good deal of displaced dirt.


IMG_6229


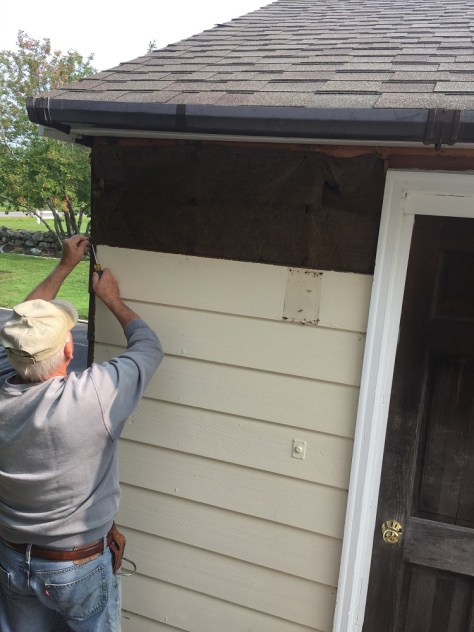
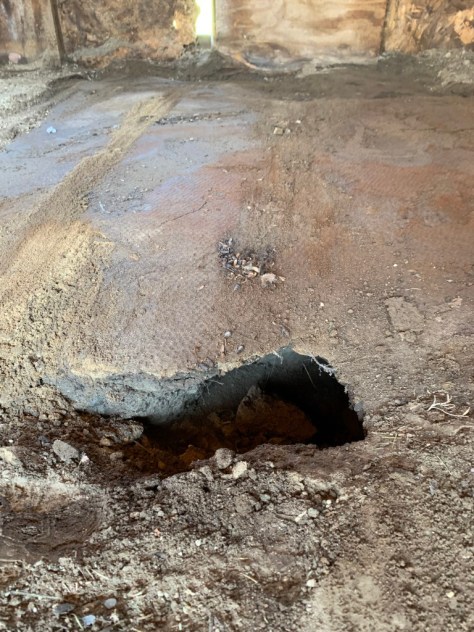
Thanks to numerous woodchuck tunnels…


IMG_6228


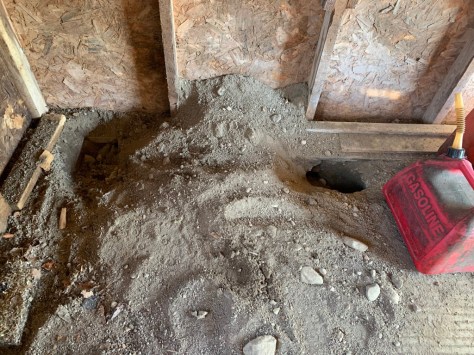
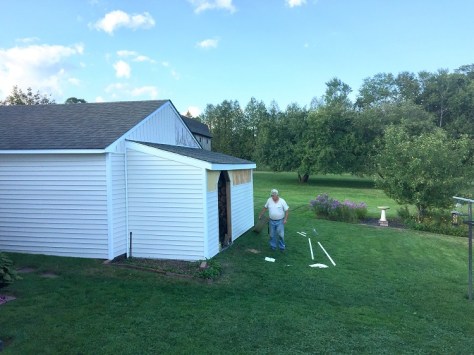
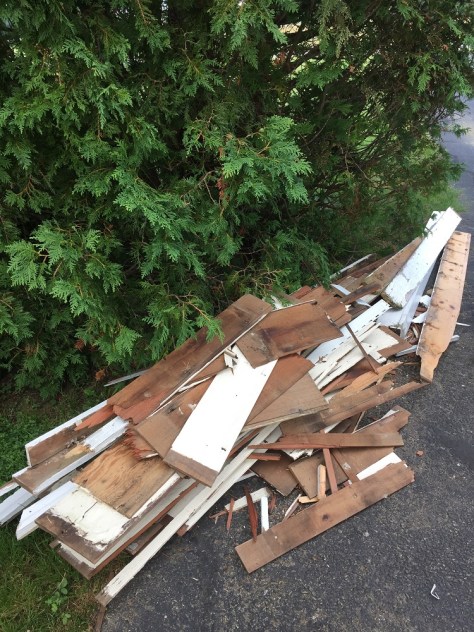
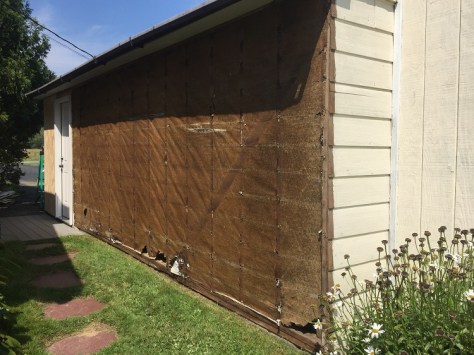
Which undermined our attempt to simply re-side and re-shingle the damned thing.


IMG_6230


Now we have to completely dig up the hard packed floor and smooth it all out.


IMG_6278


Doesn’t that sound like fun?


3_5-300x252


Baby barn work continues.


If there’s one thing I’ve learned about my husband during our long and happy marriage, it’s that he doesn’t like to rush things.

Projects that should take a day, take a week. Projects that should take a week, take a month. Projects that should take a month, well… you get the idea. He’s been working on our big barn for what seems like forever and it’s still not finished.


repaying-student-loan


So our baby barn/shed needs to be torn down and rebuilt. Husband decided the frame of the building and the existing wood on the roof were sound, and is attempting to tear down the rotten parts and rebuild around them.

First off is the old shingles.


IMG_5994


There’s no real reason for this picture other than the fact I love to see a man sweeping.

It’s porn for women.


porn-for-women-book2-640x533


But I digress…..


IMG_5995


Shingles off the front side, tar paper off the lower half.


IMG_6006


Section of roof off… so he can remove the section of wall below.


IMG_6009


It was at this point he decided to level the building.


IMG_6011


And that involved stomping all my flowers into the dirt, which made me….


And run for a trowel.


IMG_E6017


Flowers dug up…


IMG_6015


Potted and moved to the relative safety of the big barn porch.

Of course by the time I’d turned around, he’d stolen bricks and edgers from my garden beds to raise the building.


IMG_6019


Which made me….


And run to gather them up before I was left borderless.


IMG_6039


One new section of wall in place, old section of roof replaced.


IMG_6021


If you’re wondering how long this operation took?

An entire 4 day holiday weekend.

Yes, 4 friggin’ days!

Reason being, my husband is the least organized man on earth and had none of the materials he needed when he started this project and kept having to run to the store… a half an hour away. He can also never find any of his tools and spends 20 minutes cursing and kicking things over looking for them until he gives up and asks me.

Of course he also had to get a haircut, have breakfast with the boys, hit a yard sale, drive an hour to complain to the man who painted his truck last year because it’s already starting to chip, visit his brother, sharpen the lawn mower blades, stop at the pub for a beer and wash his car. Did he have to do all that while trying to rebuild the baby barn?

No. He did not.

But now you see why weekend projects take months.

Fast forward to Monday afternoon. We lay out and cut tar paper…


IMG_6022


While a storm moves in.


IMG_6023


Have you ever tried to lay tar paper on a roof in the wind and rain?


IMG_6024


It’s not fun. Yours truly was on the other ladder and had to put  her phone inside so there aren’t any pictures of me soaking wet and wind blown…. laying across the paper as it was ripping off the roof in a deluge.

Good times.


not


At this rate, I think the project will be done by the time Elon Musk reaches Mars….

Or Richard Simmons stages a comeback.


Stay tuned.


So…. this is happening.


You may remember me posting pictures of our little red barn/shed.

We use it as a shed, but it was originally a small barn complete with horse. The horse is long gone…. and 40 odd years later?

The barn/shed is almost gone as well.


IMG_4775


Falling apart?

You could say that…


IMG_4785


Rotted wood?


The mere fact that it’s still standing never ceases to amaze me.


IMG_4774


It’s horrible. An eye sore on our otherwise lovely property. The bane of my existence for a long, long time.

It’s state of disrepair is the main reason we spent $50,000 and 7 years of nights and weekends building a new and much larger barn.


IMG_0158 (Edited)


The plan? All the mowers and weed whackers, the snow blower, the tractor and assorted yard tools that were in the shed/barn were supposed to go into the new barn…. and the eyesore would be torn down.


But that never happened, and now the husband….. who has already filled the new barn with CRAP wants to rebuild the shed/barn to continue housing the mowers, tractor etc.

So this is happening.


IMG_5836


Husband deemed part of the interior framing sound, and started what I thought was deconstruction of the back half…. which needs to be completely rebuilt..

Now my idea of deconstruction consists of ripping off the roof, then the walls. The husband’s?

I’m not quite sure.


IMG_5838


He put up a new piece of wood…


IMG_5839


Ostensibly to brace the roof… though why you need to brace something you’re tearing down is beyond me.


IMG_5840


But look at the piece he’s bracing! Rotted doesn’t begin to describe it…

Then…


Yeah. He trimmed it…

The rotted piece of wood.


IMG_5842


He sawed off a section of wall… by hand, even though the chainsaw was right there.


IMG_5845


And made a bigger hole.


IMG_5871


He elongated the brace….


IMG_5872


And added wood running along the bottom.


He was supposed to be tearing it down…. so WTH?

Naturally I had to ask.

And naturally, he wouldn’t answer.

It was hot, he was cranky and I dared to question his technique.

Silly me.


Because when Rustoleum says red? They mean red.


Every few years it’s time to repaint the bulkhead doors.


IMG_4901


They’re metal and tend to see a lot of abuse.

Rain, snow, and baking sun all take their toll… and since the husband disappears every time the paint brushes come out?


The job falls to me.

I usually go out with some sandpaper to smooth and remove the flakes… but this spring the husband bought an old sander at a yard sale. Old.. with a capital O.

So he tossed it at me and said it would be much easier than my sandpaper.


From the look of the cord it was from the 1950’s…. and I think that was the poundage as well because just lifting it hurt my wrist. So when he came back to check my progress? I was using the sandpaper again.

Which… because he’s a man and can never be wrong… made him determined to prove his $5 purchase was worth while.


IMG_4904


He got no argument from me.

I stood back, nodded sagely and mumbled yes dear, that’s so much easier dear, at appropriate intervals.

Momma didn’t raise no fool.


IMG_4903


He sanded that baby from top to bottom.


IMG_4907


Inside and out… even though I rarely paint the interior.

BTW, if you search Google images for power sander memes?


birdie


Anyway… when we moved into this house, the doors were painted a barn red so that’s what I’ve always repainted them.

Until this year, when I couldn’t find my usual brand of metal paint in barn red and went with Rustoleum’s Regal Red.


It was a bad idea.

Very bad.

Really, really bad.

Because when Rustoleum says red?


IMG_4929


They mean red!

Fire engine red.

Candy apple red.

Holy Crap that’s redRED!

It’s positively blinding.


IMG_4928


On the bright side, the doors do now match my hanging geranium.